Get the most out of your EVGA NU Audio Soundcard with VoiceMeeter Banana
If you’re anything like me, getting the best audio is a must for gaming. The EVGA NU Audio soundcard is one of those additions you have to have. But getting the most of it when dealing with streaming can be challenging. After various testing methods, I wanted to share the best setup for the EVGA NU AUDIO Soundcard along with Voicemeeter Banana for streaming.
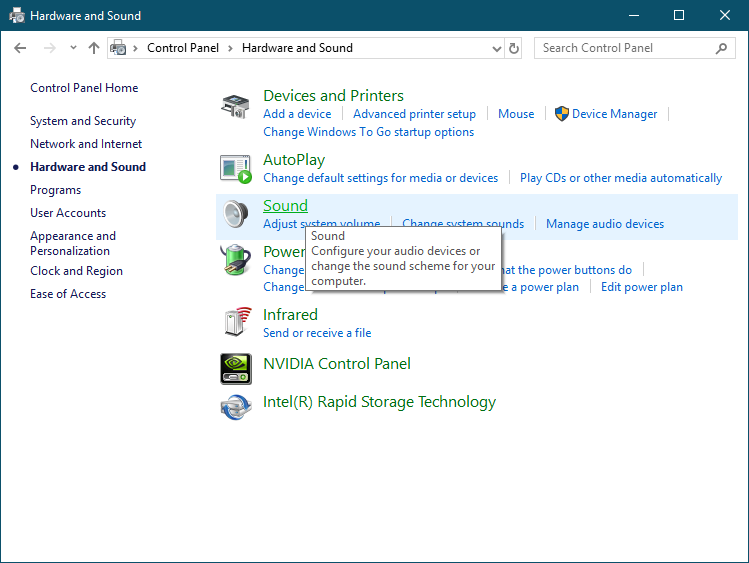
- First, go to Control Panel > Hardware and Sound > Sound

Select Sound from the Control Panel
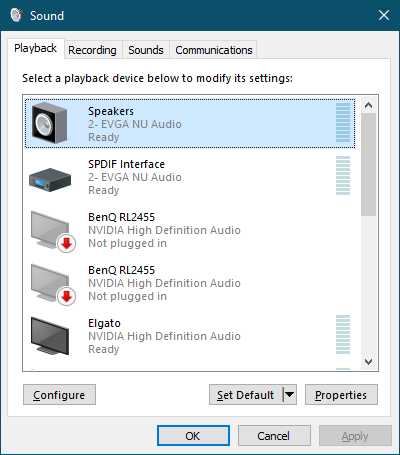
- Next click on the Playback Tab and right click Speakers (EVGA NU Audio)

Select EVGA NU Audio Speakers
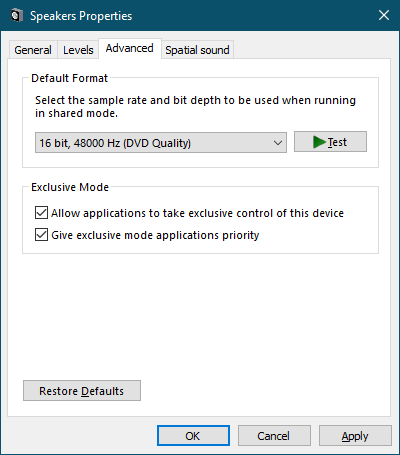
- Click on the Advanced Tab and select 16 bit, 48000 Hz (DVD Quality). This seems to be the best quality for transferring audio to streams

Select Advanced Tab
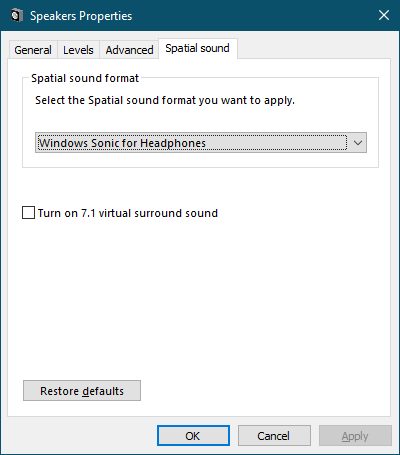
- Now, select the Spatial sound tab and turn on Windows Sonic for Headphones (included with Windows) or Dolby Atmos (paid). This allows a virtual surround environment to be applied to your soundcard. Leave 7.1 virtual surround sound unchecked or checked. There was no differenced in my testing results either way. I just leave it unchecked. Click Apply and OK.

Select the Spatial Sound Tab
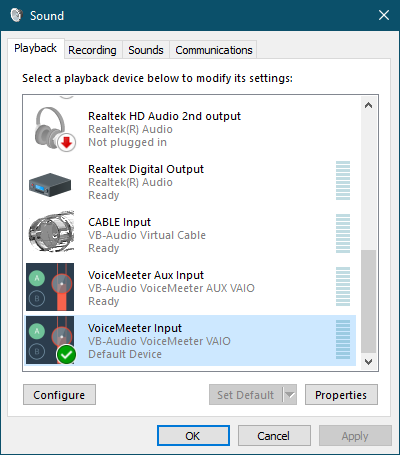
- Next, right-click VoiceMeeter Input

Select VoiceMeeter Input
- Next, click on the Advanced Tab and select 16 bit, 48000 Hz (DVD Quality). This seems to be the best quality for transferring audio to streams.

Select Advanced Tab
- Now, select the Spatial sound tab and turn on Windows Sonic for Headphones (included with Windows) or Dolby Atmos (paid). This allows a virtual surround environment to be applied to your soundcard. Leave 7.1 virtual surround sound unchecked or checked. There was no differenced in my testing results either way. I just leave it unchecked. Click Apply and OK.

Select the Spatial Sound Tab
- Right Click VoiceMeeter Input and select as Default Device

Select VoiceMeeter Input as Default Device
- Next step, plug your headphones into the EVGA NU Audio Soundcard.
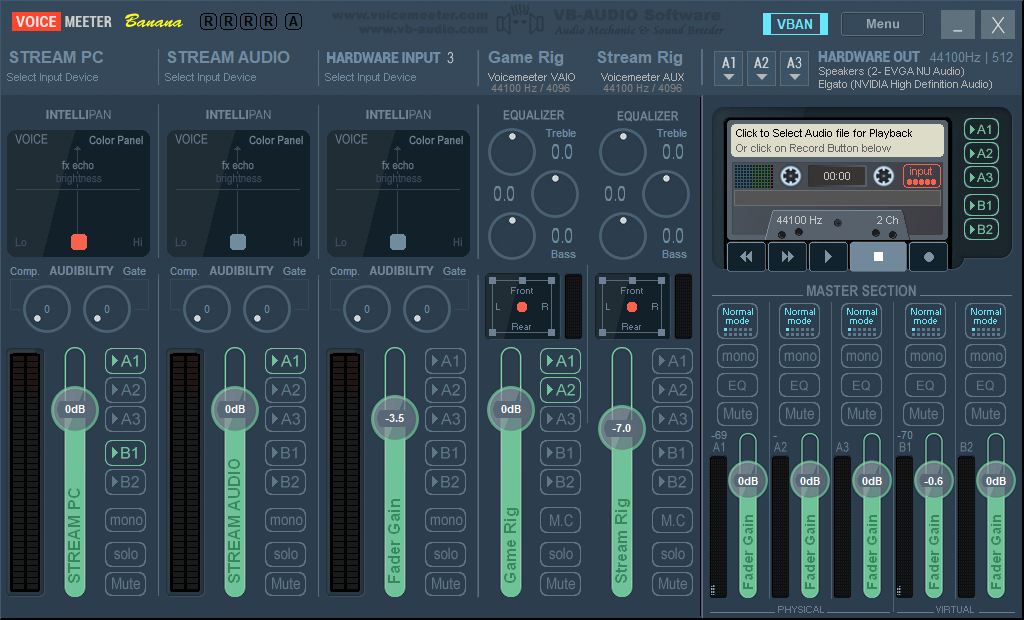
- Now, open VoiceMeeter Banana and under Hardware Out A1 select Speakers (EVGA NU Audio)

Select EVGA NU Audio for A1 on Hardware Out
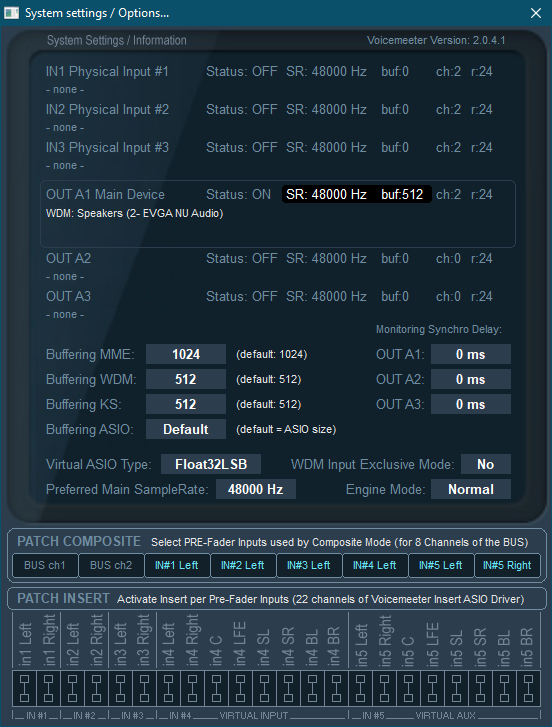
- Finally, Click Menu > System Settings and under Preferred Man SampleRate: Select 48000 Hz to match your output selected earlier.

Under System Settings Preferred Main SampleRate enter 48000 Hz
In conclusion, this covers setting up the EVGA Nu Audio soundcard up with VoiceMeeter Banana. If requested, I will put together another How-To on transferring and setting up the audio into your stream, or a second PC dedicated to streaming.
I hope you all enjoy and if you have any questions, just let me know!
You must log in to post a comment.